


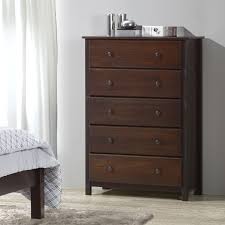
Any time I go shopping for home furnishings I am reminded that I have champagne taste and a beer (if that) budget. So I decided to finally put my Pinterest to use, and while it wasn't exactly the same as the pictures, it also was not as bad as the "fails of Pinterest". I figured go big or go home, so I painted a pretty large, wooden dresser. If you're looking for a semi simple, cheap way to update the look of a room in your home then slapping a fresh coat of paint on the furniture definitely helps!
I want this...

But I can afford this...
So I have to come up with a compromise between the two, which usually involves buying something taht is not what I want and revamping it to closely resemble what I wanted! It is definitely a much more affordable option! If you've been thinking about painting something you should try it out! I put together the steps I take to paint my furniture and it has worked out great for me so far!
Step 1: Brainstorm
I hit Pinterest hard to get ideas of what exactly I wanted the end result to look like. Also hit up your local paint store (or Home Depot) to ask someone in the paint department questions like, what does a primer do? What colors look okay over the type of wood you're painting. They are there to help, so utilize them! I learned that there's a paint with a built in primer (so helpful) and that a matte paint was probably going to produce the look I was going for.

Step 2: Prepare
Make sure that you have an area to work in. Paint splatters are not fun to clean up, so give yourself a forgiving amount of drop cloth the ensure that you don't end up with splatter on the floor. Also getting all your supplies together helps prevent having to stop mid creation to get a different brush or more sandpaper. A good rule of thumb is if you think you'll need it, have it on hand. The supplies I used were:
- wooden dresser (Or whatever you are painting, be sure to remove any drawers, knobs or hardware)
- drop cloth (I had one, but you can purchase a drop cloth at a home improvement store. Old shower curtains work great and are a cheap option!)
- sandpaper (I bought the cheapest sheets I could find at Home Depot and they got the job done)
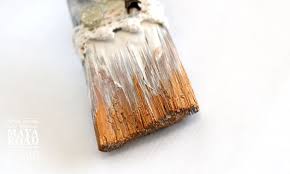
- large paintbrush (I used one about the size of my palm to get a distressed look)
- small paintbrush (I used a very small one the size of a pen for the dresser knobs)
- paint (Again, Home Depot. I used a water based matte paint that had a primer in it to save myself some time, then I used a craft paint purchased at Walmart for the knobs)
- Top coat (I got the spray can variety at Home Depot, this step is optional, but a good idea if the piece you are painting is used a lot)
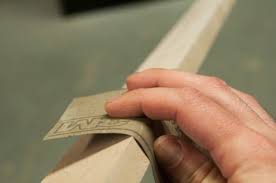
Step 3: Sand
I sanded down the dresser the old fashioned way. You want to get down to the originial wood, so you're not painting on paint or painting on stain. This was also great for my piece because it had definitely seen better days and had some areas that had spills or discolorations and sanding it took those away.
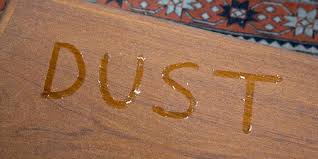
Step 4: Dust
Sanding creates dust. Once you are all done with sanding down your creation you'll have to wipe away all the dust. Be diligent with this because dust particles can get caught in the paint and give a grainy look. I used a dry paintbrush to sweep off the majority of the dust and then a damp rag to remove the rest.
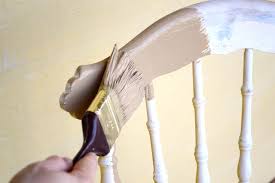
Step 5: Paint!
If you are using a primer you will have to apply that first. If you are like me and got a paint with a primer then stroke away! For this dresser I wanted to give a distressed look so I was not worried about streaking. Broad strokes in the same direction cut down on the "lines" in the paint. Be sure to get all the nooks and cranies, I completely forgot about the feet until the last minute! Getting every corner now prevents having to unload drawers again!

Step 6: Watch Paint Dry
I'm kidding, but you do need to wait for the first coat to dry. While I waited I painted my knobs. Mine were also wooden so I sanded them down before applying the paint, then set them aside to dry. Once you are sure that the first coat has fully dried apply a second.

Step 7: If streaking..
To get the streaked gold effect I took a large, dry paint brush and dipped it in the gold paint I used for the knobs. I used very light brush strokes randomly across the dresser to give a true look of distress. Once you are happy with the look, its back to the drying board.
Step 8: Top coat.
Apply a top coat. I used a spray paint top coat on this, which took less than five minutes. The extra clear coat is great especially if you are using a two in one paint/primer.
Give it some time...
Be sure to give your paint a safe amount of time to dry, you don't want to go through all that work to end up with a smudge! Giving furniture a fresh coat of paint is a great, cheap way to change up the look and feel of any room! Voila!


Leave a comment